Talkative Acuity Integration
The Talkative integration into Acuity allows companies to automatically schedule interactions in a specific queue when an appointment is scheduled in Acuity.
This integration leverages the scheduled interaction tool within Talkative, which allows you to book a scheduled interaction in the future for a customer at a specific time and date, pointing this to a specific queue.
The integration will allow Talkative to listen for appointments created in Acuity Scheduling and then creating a scheduled interaction automatically. The queues in Talkative are mapped to appointment types within Acuity Scheduling. In addition to handling the creation of the scheduled interaction, this integration is also able to handle changes to appointment date, time or it can cancel the scheduled interaction is the appointment is cancelled.
Integration Setup
The setup for this integration is done in two parts. The first is setting up the integration by providing Talkative with API keys so it may access your Acuity account. The integration supports having multiple acuity accounts which might be beneficial in the case of different business departments using the software.
Retrieving API Keys
The first step is to retrieve your API keys for your acuity account. Please note, you must have a “Powerhouse” plan to enable you to access your API keys. Without this plan, you will be unable to setup this integration.
Once you have logged into acuity, navigate to the integrations page, the link for which can be found in the left hand menu:

When you are on the integrations page, scroll down until you see the API integration:

Once you are here, click the “view credentials” link.
The credentials will appear in the top right hand corner of your screen:
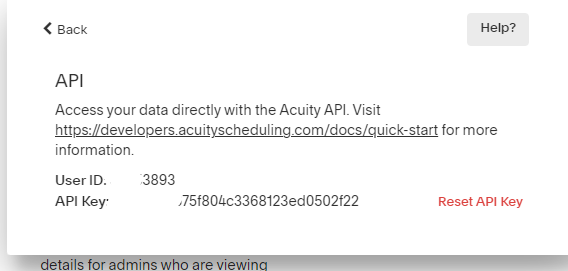
We have covered our credentials for security reasons. From here you may also reset your API key. Please note, if you do reset the API key, you will have to delete and recreate your integration within Talkative. We recommend deleting it first, as invalidating the key will prevent us from deleting any existing webhooks.
Setting up Talkative Acuity Configuration
Before you are able to setup an Acuity Configuration in Talkative, you must first setup scheduled interactions. If you have not done this, please review the scheduled interactions documentation and complete the setup for this. You will be unable to access the acuity configs until this configuration is done.
Firstly navigate to https://YOUREGION.engage.app/acuity-configs - swapping YOURREGION for the relevant region you are in.
This will show the following page:
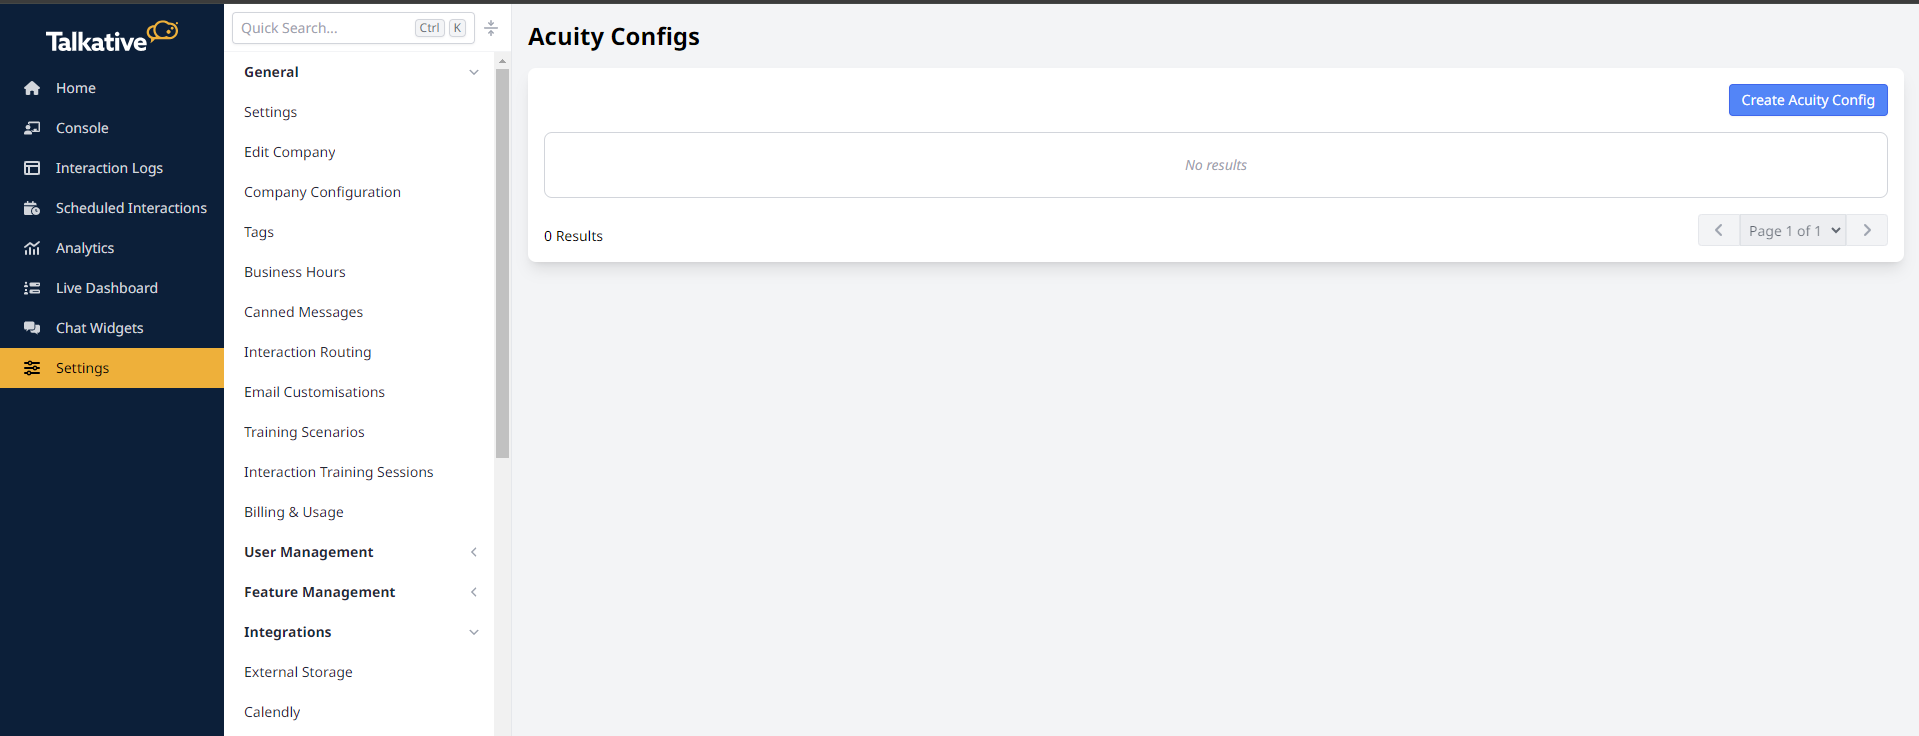
From this page, click “Create Acuity Config” and you will be shown the following page:
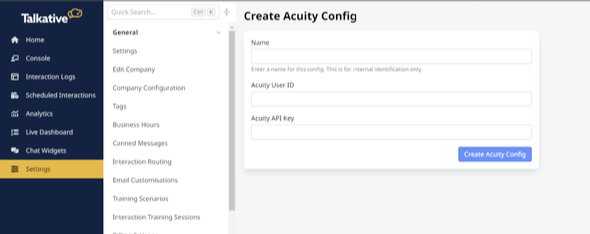
The name field is for internal reference only, so you can choose whatever useful identifier you like. Then enter the Acuity User ID and Acuity API Key you retrieved the previous step.
The validation for this step will check to make sure the combination of the user and API key are valid. If they are not valid, it will throw a validation error.
When the integration has been created, you will return to the index page. From here you will be able to view all of the integrations you have created, and then navigate to the queue configuration page.

Setting up Acuity Queue Configuration
Now you have an integration into acuity, you can map appointment types to talkative queues. Click on the “View Queue Configs” on the appropriate configuration as per the above screenshot.
This will show another index page which will list all of your queue/appointment type mappings:

Click “Create Acuity Queue Config” in the top right hand corner to create a mapping. This will display the following form:

As with the acuity integration, you can create a name to identify the link internally. This could be something like “Sales Interactions” or similar. This is not exposed externally, so this can be anything you like.
Next choose an Acuity Appointment Type. These are pulled via the API from Acuity – so will list all of your configured appointment types. Choose one from this list and then choose to map it to a queue. You can map multiple different types to the same queue.
Note: in this current version, there is no validation to prevent you from mapping the same type to multiple queues. Whilst this will store in the database, it will cause issues with the webhooks. In a later version of this, there will be validation to prevent this from occurring.
Once you have created a queue config you will be redirected to the queue config index page and you will see your queue config:
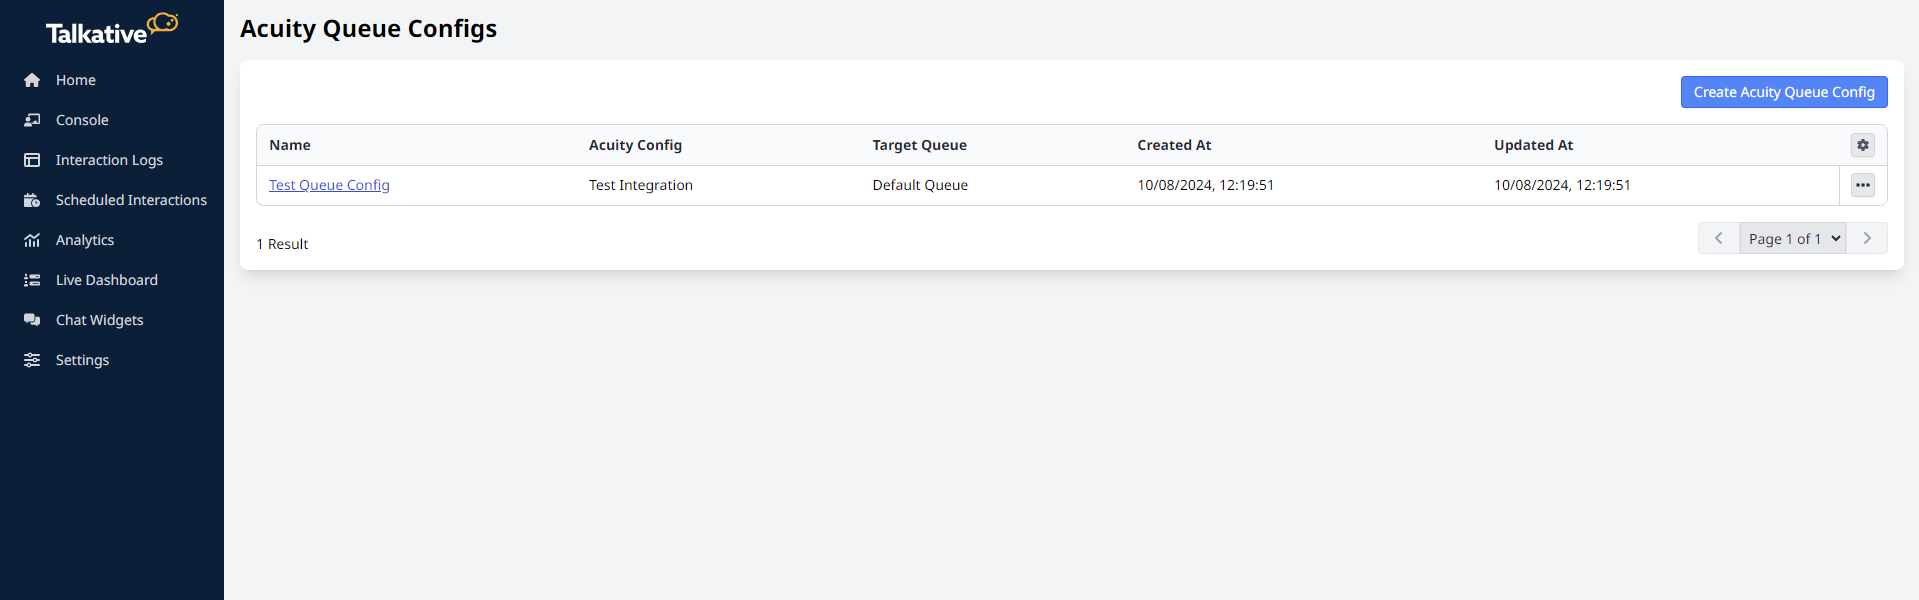
You can create as many as these as you require for your various appointment types.
Note: If you delete an appointment type in Acuity, Talkative will not be aware and will keep listening for events with this appointment ID.
You can edit these configurations to change the event type or target queue by clicking on the three dots to the right of the configuration and selecting edit, or if you no longer require this mapping, you can choose to delete it.
Queue Configuration
The queue you point your scheduled interactions too must be configured for the type of interaction you wish to conduct. If you wish to have the interaction load as a video interaction, you must set the queue type to be video, and not chat. The interaction will take its initial channel from the queue it is created in.

Configuration Summary
Once the above steps have been completed, your integration will begin to work and require no additional maintenance.
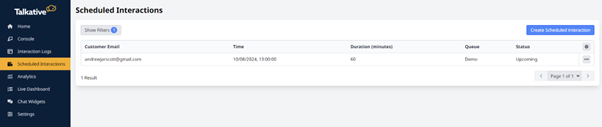
When a customer books an appointment via Acuity, the interaction will be shown in the scheduled interactions page. This page can be accessed from the main menu or via this link: https://YOURREGION.engage.app/scheduled-interactions
If you need to make changes to an appointment time, this should be done via Acuity. Any changes made in Talkative may be overridden by future webhooks sent from Acuity.
Scheduling and Accepting Interactions
This guide will not cover general Acuity configuration, for help and support with setting up your acuity system and appointment types, please refer to the acuity documentation which can be found here: https://help.acuityscheduling.com/hc/en-us
Providing customers a link to their scheduled interaction
To allow customers who have booked an appointment to be able to join the video call, we need to include a link in the confirmation email they receive. This link will use the ID of the appointment generated in Acuity to allow us to redirect them to the scheduled interaction in Talkative.
To do this, please scroll down to the notifications section of menu on the left hand side of your configuration page in Acuity and then click on “Client Email”:

Acuity allows you to add links to your email templates, and those links can also include placeholders, which will be substituted with data from the appointment. In this case, we hook into the appointment ID to redirect users to the correct scheduled interaction.
This link should be formatted as follows:
https://YOURREGION.engage.app/scheduled-interactions- customer/acuity/%appointmentID%
This will result in the link being generated with the corresponding appointment ID.
This link should be included in all the templates which the customer will receive to allow them to load their scheduled interaction.

Booking an Appointment via Acuity
Once you have setup all your appointment types in Acuity and mapped them to the relevant queues you can start accepting appointments and updated your email templates. Navigate to your personal booking page provided by Acuity.

Choose an appointment type by clicking book, and then add any information which may be required for the given appointment type, and then finally chose and appointment time:

The times displayed will be in the local users time, when this data is sent to Talkative, we convert and account for the time zone and show this information in the time zone configured in Talkative.
When an appointment has been booked, it will show in your scheduled interactions page within Talkative.
If the customer makes any changes to the appointment, or cancels it, this will be updated and reflected within Talkative. Changing the filter in Talkative will allow you to see cancelled scheduled interactions.
In the interests of data retention policies, we delete a reference to the customers email here once an appointment has been cancelled. This information will be visible within Acuity for analysis if required.
Accepting a Scheduled Interaction created via Acuity
Scheduled interactions are pushed to a queue much in the same way an on-demand interaction is. For an agent, there is no discernible difference in the experience.
Agents should be available in the queue as normal. They might be specifically intended to handle only scheduled interactions, in which case you may have them as a member of a scheduled interaction queue which will only have scheduled interactions directed towards it, or you might have them handling a combination of scheduled interactions and on-demand interactions. This could be configured by having a queue specifically for scheduled interactions and another queue for on-demand interactions and having the agent be a member of both queues, or just having both on-demand interactions and scheduled interactions enter the same queue.
The configuration you choose for this will depend on your personal preference. For advice or support as to which is the best option for your use case, please reach out to your account manager who will be able to provide further tailored advice.
The customer interface
When the customer clicks the link provided to them in the email which we configured earlier, they will be directed to the scheduled interaction page:
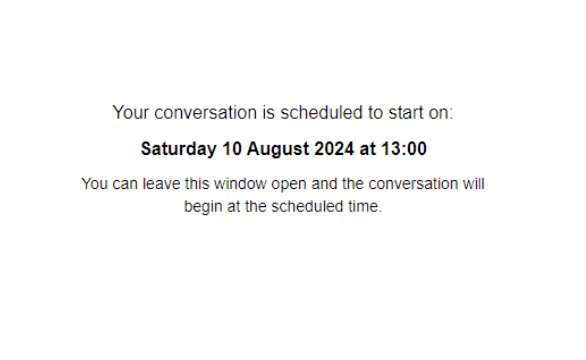
If you have configured a custom page to accept scheduled interactions, they will be redirected to this page automatically.
Please note: configuring your own landing page for scheduled interactions will require significant configuration and development from a competent developer. We will not support this development without a commercial agreement in place which will cover the “Pro-services” required for this project. Please speak to your account manager to discuss this.
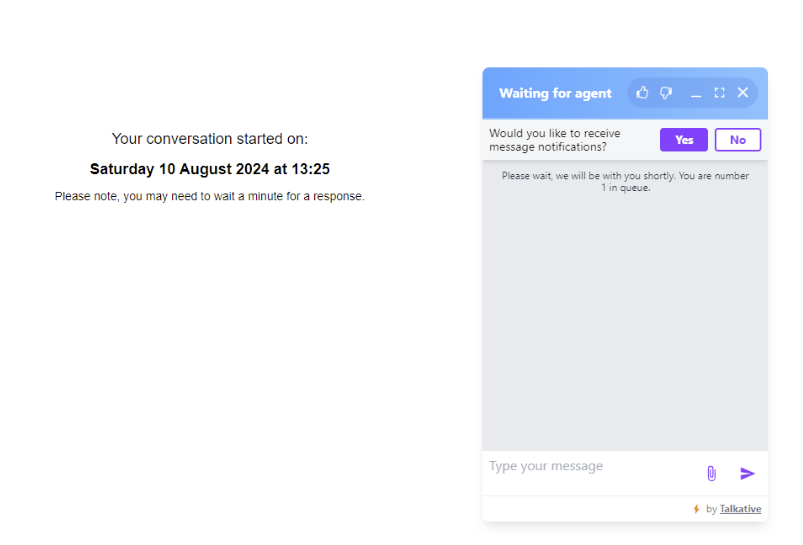
When the interaction starts the customer will see the widget load:
And the agent will see an interaction appear in their queue:
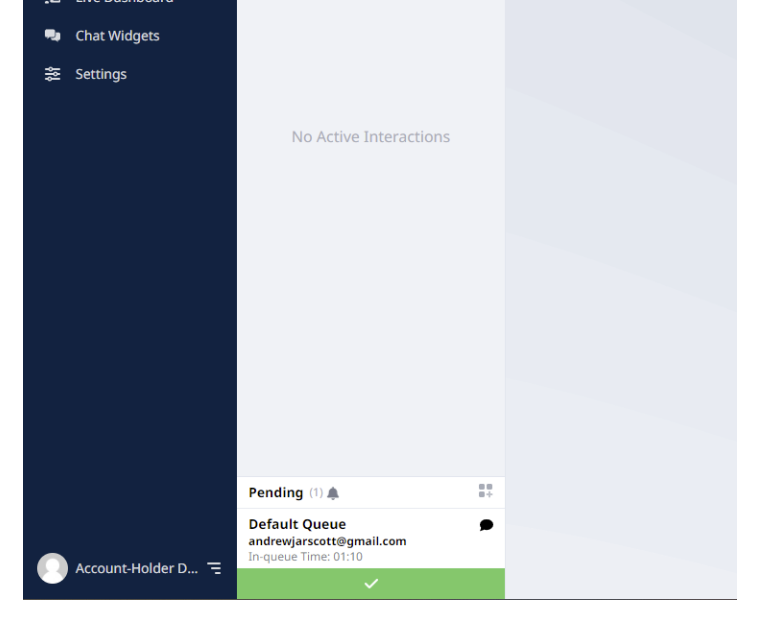
The agent will be able to accept this interaction as normal and converse with the customer.
Was this article helpful?
That’s Great!
Thank you for your feedback
Sorry! We couldn't be helpful
Thank you for your feedback
Feedback sent
We appreciate your effort and will try to fix the article